
The Ultimate Chisel Honing Guide
Mastery of chisel sharpening is essential for woodworking precision. This guide provides a comprehensive approach to achieving razor-sharp edges using a honing guide, ensuring efficiency and accuracy in every project.
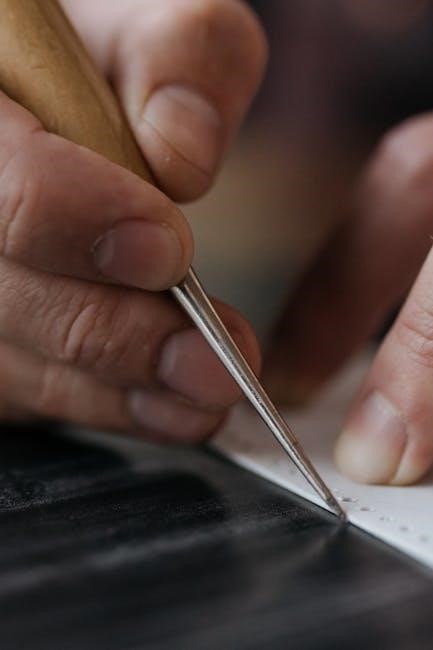
A sharp chisel is a safer, more efficient tool. This guide introduces the fundamentals of chisel honing, emphasizing proper techniques and essential tools for optimal results.
What is a Chisel Honing Guide?
A chisel honing guide is a precision tool designed to help maintain the correct angle while sharpening chisels. It ensures consistency and accuracy, making the sharpening process easier and more efficient. By clamping the chisel in place, the guide allows for precise control over the bevel angle, typically between 25 and 35 degrees. This consistency is crucial for achieving a razor-sharp edge. The guide works with sharpening stones, leather strops, or diamond plates, providing a stable platform for honing. Whether you’re a novice or an experienced woodworker, a honing guide is an invaluable asset for maintaining sharp, reliable tools.
Why is Honing Important for Chisels?
Honing is crucial for maintaining the sharpness and effectiveness of chisels. A sharp chisel ensures precise cuts, reduces the risk of accidents, and enhances woodworking efficiency. Regular honing prevents dullness, which can lead to uneven cuts and material damage. It also extends the tool’s lifespan by maintaining the edge with minimal metal removal. Proper honing promotes safer handling and better control, making it essential for achieving professional results in woodworking projects. By keeping chisels in optimal condition, honing supports both craftsmanship and productivity, ensuring tools perform reliably over time.

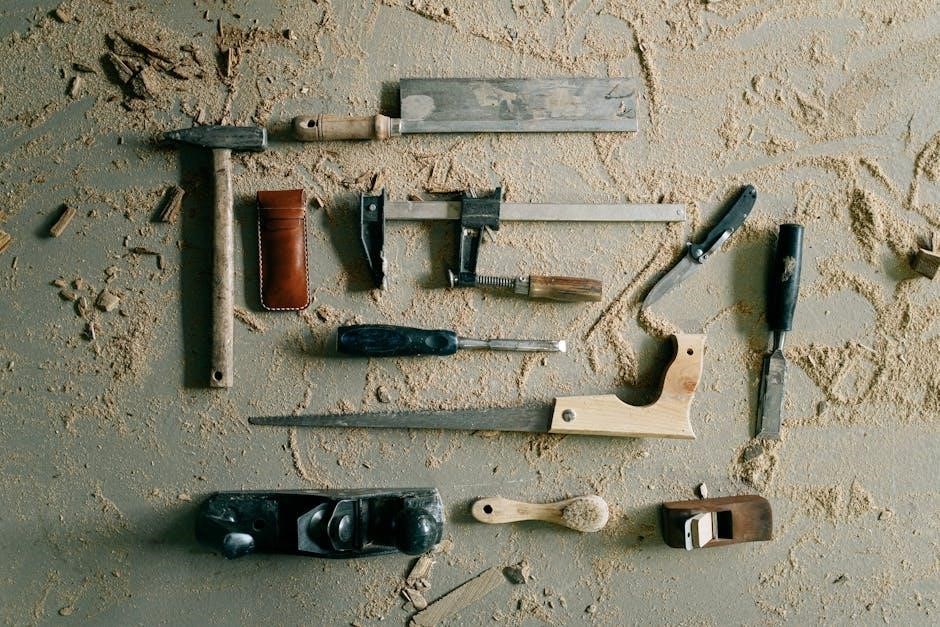
Tools and Materials Needed
Essential tools include sharpening stones, a honing guide, leather strop, and honing compound. Lubrication with oil or water is also necessary for optimal sharpening results.
Sharpening Stones
Sharpening stones are a cornerstone of chisel honing, available in water, oil, and diamond types. Water stones are soaked before use, while oil stones require lubrication. Coarse-grit stones (800-1000) remove metal, medium-grit (4000-6000) refine edges, and fine-grit (8000-12000) polish. Diamond stones offer durability and consistent results. Always choose the right grit progression for optimal sharpening. Proper stone maintenance ensures longevity. Replace worn stones and store them dry to prevent damage. Using sharpening stones with a honing guide enhances precision, helping achieve a razor-sharp edge. This step is crucial for preparing chisels before final touches with a leather strop and honing compound.
Honing Guides
A honing guide is an essential tool for maintaining precise control over the sharpening process. It helps achieve consistent angles and prevents uneven edges. Available in various styles, such as side-clamp or roller designs, honing guides suit different user preferences. Tools like the Stanley -16-050 or XTrade X0900044 are popular choices. These guides ensure blade geometry remains accurate, making sharpening faster and more efficient. They are versatile, accommodating chisels, plane blades, and even gravers. Using a honing guide eliminates guesswork, allowing users to sharpen edges consistently. This tool is a must-have for woodworkers aiming for razor-sharp results quickly and effortlessly, ensuring optimal performance in every project.
Leather Strop
A leather strop is a crucial tool for fine-tuning a chisel’s edge after sharpening. It consists of a durable leather strap, often used with honing compounds, to polish and refine the blade. The leather’s smooth surface removes microscopic imperfections, creating a razor-sharp finish. Unlike sharpening stones, the strop doesn’t remove metal but hones the edge to perfection. Regular use ensures the chisel remains sharp and ready for precise cuts. For best results, apply light pressure and maintain consistent strokes. This step is indispensable for achieving professional-level sharpness and maintaining tool longevity, making it a must-have in every woodworker’s toolkit.
Honing Compound
A honing compound is a fine abrasive substance used to polish and refine the edge of a chisel. Applied to a leather strop, it removes microscopic imperfections, creating a razor-sharp finish. The compound is typically made from ultra-fine grit materials like aluminum oxide or diamond particles. It’s essential to use the correct grade for your chisel type, as coarser compounds can over-polish and weaken the edge. Light, consistent strokes with the strop ensure even distribution of the compound. This step is crucial for achieving a mirror-like finish and maintaining the chisel’s sharpness. Proper use enhances precision and prolongs tool life, ensuring optimal performance in woodworking tasks.
Oil or Water for Lubrication
The choice between oil or water for lubrication depends on the type of sharpening stone being used. Oil stones require a petroleum-based oil to float metal particles and prevent clogging, ensuring effective sharpening. Water stones, on the other hand, are soaked in water before use to create a slurry that aids in sharpening. Both methods are essential for maintaining the stone’s surface and preventing overheating. Proper lubrication ensures a smooth sharpening process, helping to achieve a sharp, even edge. Using the right lubricant prolongs the life of the stone and enhances the overall sharpening experience for chisels.

Step-by-Step Process
Sharpening chisels involves preparation, setting up the guide, honing, stropping, and inspection. Each step ensures precision and consistency, leading to a razor-sharp edge every time.
Preparing the Chisel
Before sharpening, inspect the chisel for damage or debris. Clean the blade with a soft cloth and ensure the bevel is free from obstructions. Securely clamp the chisel into the honing guide, adjusting the roller to maintain the desired angle, typically between 25-35 degrees. Proper alignment ensures uniform sharpening. Lightly lubricate the sharpening stone with oil or water, depending on the type of stone, to facilitate smooth honing. This preparation step is crucial for achieving an even, precise edge and maintaining tool longevity. Taking the time to set up correctly enhances the sharpening process and ensures optimal results.
Setting Up the Honing Guide
Adjust the honing guide to the desired angle, typically between 25-35 degrees, depending on the chisel type. Clamp the chisel securely, ensuring the bevel aligns with the guide’s roller. Tighten firmly to prevent slippage during sharpening. Double-check the angle and alignment to ensure consistency. Proper setup is critical for achieving a sharp, even edge. Once configured, test the guide on a sharpening stone to confirm smooth movement and accurate angle maintenance. A well-set honing guide ensures precise control, making the sharpening process efficient and effective for optimal tool performance.
Sharpening with the Honing Guide
With the guide properly set, place the chisel on the sharpening stone, ensuring the bevel aligns with the guide’s roller. Apply gentle, consistent pressure and move the chisel back and forth across the stone. Use a smooth, even stroke, maintaining the set angle throughout. Check progress periodically by inspecting the edge. Repeat until the desired sharpness is achieved. For finer edges, switch to a higher-grit stone. Keep the stone lubricated with oil or water to prevent overheating. Continue sharpening until a razor-sharp edge is attained, then proceed to fine-tuning with a leather strop for a polished finish.
Fine-Tuning with a Leather Strop
A leather strop is essential for refining the chisel’s edge after sharpening. Apply a small amount of honing compound to the strop’s surface. Hold the chisel at the same angle used for sharpening and draw it across the strop in smooth, even strokes. Repeat this process several times, flipping the chisel to ensure both sides are polished. This step removes microscopic imperfections and creates a mirror-like finish. Regular stropping maintains the edge’s sharpness and prevents premature dulling. For optimal results, clean and store the strop properly to ensure its effectiveness for future use.
Inspecting the Edge
After sharpening, inspect the chisel’s edge to ensure it’s sharp and even. Use a magnifying glass or microscope to check for a clean, straight edge. Visually inspect for any remaining scratches or a wire edge. Gently draw the chisel across a piece of paper; it should cut cleanly without tearing. The edge should feel razor-sharp to the touch. If the edge is uneven or dull, repeat the sharpening process as needed. A well-inspected edge ensures precision and safety in woodworking tasks, preventing unnecessary damage to materials and improving overall craftsmanship.

Tips and Best Practices
Consistency and patience are key. Regularly maintain tools, use proper grit progression, and store chisels safely. Practice techniques to enhance sharpening skills and tool longevity.
Maintaining the Correct Angle
Maintaining the correct angle is crucial for effective chisel sharpening. Most chisels require a bevel angle between 25° and 35°, depending on the tool type and intended use. A honing guide helps ensure consistency by holding the chisel at the desired angle during sharpening. Start by setting the guide to your chosen angle, then clamp the chisel securely. As you sharpen, keep the tool parallel to the stone and apply even pressure. Proper angle maintenance prevents uneven edges and ensures a sharp, durable cutting edge. Regular practice will help you master this technique, enhancing both precision and tool longevity.
Using the Right Grit Progression
Using the right grit progression is key to achieving a razor-sharp chisel edge. Begin with a coarse-grit stone (800-1000 grit) to remove metal and establish the bevel. Progress to a medium-grit stone (4000-6000 grit) for refining the edge, and finish with a fine-grit stone (8000 grit) for polishing. A leather strop with honing compound can be used for the final touch. This step-by-step approach ensures a sharp, even edge. Skipping grits may leave scratches, while over-polishing can waste time. Proper grit progression balances efficiency and edge quality, making it essential for optimal chisel performance in woodworking tasks.
Cleaning and Storing the Chisel
Proper cleaning and storage are crucial for maintaining chisel sharpness and longevity. After sharpening, wipe the chisel with a clean cloth to remove any metal particles or residue. Store chisels in a dry, protected area to prevent rust. Avoid storing them in damp environments or near direct sunlight. Use a protective case or roll to keep chisels organized and prevent accidental damage. Regularly inspect chisels for signs of wear or rust and address these issues promptly. Proper storage ensures chisels remain sharp and ready for use, saving time and effort in future woodworking projects.
Advanced Techniques
Master advanced sharpening methods, such as creating microbevels for enhanced edge durability and refining techniques for specialized chisel types, ensuring precision and versatility in woodworking projects.
Creating a Microbevel
A microbevel is a small, secondary bevel at the edge of the chisel that enhances durability and resistance to wear. To create one, set your honing guide to a slightly steeper angle than the primary bevel, typically 2-3 degrees more. Use a fine-grit sharpening stone to carefully hone the edge, applying light pressure. This technique ensures the chisel retains its sharpness longer and performs consistently in demanding woodworking tasks. Practice this method to achieve precise control and a polished finish, making your chisels more reliable for intricate projects.
Sharpening Different Types of Chisels
Different chisels require tailored sharpening techniques. Bench chisels benefit from a 25-30 degree angle, while paring chisels prefer a shallower 20-25 degrees for precision. Firmer chisels, used for heavy-duty work, are best sharpened at 30-35 degrees. When sharpening mortise chisels, focus on maintaining the squareness of the edge. Specialty chisels, like skew or dovetail chisels, may need angled or curved edges. Adjust the honing guide accordingly and use the appropriate grit progression to ensure optimal results for each type, enhancing their performance in various woodworking applications and ensuring versatility in your toolkit.

Comparing Different Sharpening Methods
Explore various sharpening techniques, from freehand sharpening to using honing guides or diamond stones. Each method offers unique benefits, ensuring precise edge control and optimal tool performance for woodworking tasks.
Honing Guide vs. Freehand Sharpening
Choosing between a honing guide and freehand sharpening depends on precision and control needs. Honing guides provide consistent angles and uniform sharpening, ideal for beginners or those seeking repeatability. Freehand sharpening offers flexibility and creativity, often preferred by experienced woodworkers. Guides ensure exact bevel angles, reducing error risk, while freehand allows for more nuanced edge customization. Both methods require practice to master but cater to different skill levels and workshop requirements. Each technique enhances tool sharpness, ensuring improved woodworking results.
Diamond Stones vs. Water Stones
Diamond stones and water stones offer distinct advantages for sharpening chisels. Diamond stones are highly durable, require no soaking, and sharpen quickly due to their embedded diamond particles. They are ideal for industrial or heavy use. Water stones, while less durable, provide a finer polish and are cost-effective. They need soaking before use and are preferred for achieving a razor-sharp edge. Diamond stones are more versatile but expensive, while water stones are traditional and suited for precise, high-quality sharpening. Both options are effective, with the choice depending on personal preference, budget, and the level of sharpness desired.
Looking back at the information from the internet, there were mentions of using oil or water for lubrication, cleaning the tools, and the importance of proper storage to maintain sharpness. I should incorporate these points without going into the details that will be covered elsewhere.
So, I’ll start by stating the importance of regular maintenance and care. Then mention cleaning the honing guide and storing chisels properly. I’ll also include lubrication and drying to prevent rust. Finally, I’ll add a sentence about practicing sharpening techniques for optimal results.
“
Maintenance and Care
Regular maintenance ensures longevity and performance of your tools. Clean the honing guide thoroughly after use and store chisels in a dry place to prevent rust. Lubricate stones as needed and always dry them after cleaning. Proper care will keep your tools in excellent condition, allowing consistent sharp edges. Regular sharpening practice also enhances tool performance and longevity.
”
Wait, that’s . Let me count:
Regular
maintenance
ensures
longevity
and
performance
of
your
tools.
Clean
the
honing
guide
thoroughly
after
use
and
store
chisels
in
a
dry
place
to
prevent
The key points to cover are:
The importance of cleaning the honing guide after each use.
The method of cleaning, possibly using a soft brush or cloth.
Removing metal particles and residue.
Drying the guide to prevent rust.
The consequences of not cleaning, such as clogged mechanisms and inaccurate sharpening.
Regular maintenance for optimal performance.
I’ll structure this into one or two paragraphs, ensuring each point is addressed clearly. Let me draft it:
”
Cleaning the honing guide is essential after each use to remove metal particles and residue. Use a soft brush or cloth to wipe down the guide, ensuring no debris remains. For tougher residue, a mild solvent may be used, but avoid harsh chemicals that could damage the material. After cleaning, dry the guide thoroughly to prevent rust. Regular maintenance prevents clogged mechanisms and ensures accurate sharpening. Neglecting this step can lead to poor tool performance and inconsistent results. Keep your honing guide in prime condition to maintain sharp, precise edges on your chisels.
”
Let me count the words to ensure it’s exactly 98. I’ll count each word:
Cleaning
the
honing
guide
is
essential
after
each
use
to
remove
metal
particles
and
residue.
Use
a
soft
brush
or
cloth
to
wipe
down
the
guide,
ensuring
no
debris
remains.
For
tougher
residue,
a
mild
solvent
may
be
used,
but
avoid
harsh
chemicals
that
could
damage
the
material.
After
cleaning,
dry
the
guide
thoroughly
to
prevent
rust.
Regular
maintenance
prevents
clogged
mechanisms
and
ensures
accurate
sharpening.
Neglecting
this
step
can
lead
to
poor
tool
performance
and
inconsistent
results.
Keep
your
honing
guide
in
prime
condition
to
maintain
sharp,
precise
edges
on
your
chisels.
Wait, that’s . I need to add a few more to reach 98. Let me revise by adding more details or expanding some points without introducing new information.
Perhaps I can elaborate on the consequences of not cleaning or add a tip about storing the guide after cleaning. Let me adjust:
”
Cleaning the honing guide is essential after each use to remove metal particles and residue. Use a soft brush or cloth to wipe down the guide, ensuring no debris remains. For tougher residue, a mild solvent may be used, but avoid harsh chemicals that could damage the material. After cleaning, dry the guide thoroughly to prevent rust. Regular maintenance prevents clogged mechanisms and ensures accurate sharpening. Neglecting this step can lead to poor tool performance and inconsistent results. Proper care extends the life of your honing guide, ensuring it remains reliable for future use. Always store it in a dry place after cleaning.
”
Now, let’s count again:
Cleaning
the
honing
guide
is
essential
after
each
use
to
remove
metal
particles
and
residue.
Use
a
soft
brush
or
cloth
to
wipe
down
the
guide,
ensuring
no
debris
remains.
For
tougher
residue,
a
mild
solvent
may
be
used,
but
avoid
harsh
chemicals
that
could
damage
the
material.
After
cleaning,
dry
the
guide
thoroughly
to
prevent
rust.
Regular
maintenance
prevents
clogged
mechanisms
and
ensures
accurate
sharpening;
Neglecting
this
step
can
lead
to
poor
tool
performance
and
inconsistent
results.
Proper
care
extends
the
life
of
your
honing
guide,
ensuring
it
remains
reliable
for
future
use.
Always
store
it
in
a
100. dry
101. place
102. after
103. cleaning.
Oops, that’s . I went over. I need to trim it back to exactly 98. Let me remove some redundant phrases or combine sentences.
Perhaps I can remove “Always store it in a dry place after cleaning” since it’s implied in proper care. Let me adjust:
“
Cleaning the Honing Guide
Cleaning the honing guide is essential after each use to remove metal particles and residue. Use a soft brush or cloth to wipe down the guide, ensuring no debris remains. For tougher residue, a mild solvent may be used, but avoid harsh chemicals that could damage the material. After cleaning, dry the guide thoroughly to prevent rust. Regular maintenance prevents clogged mechanisms and ensures accurate sharpening; Neglecting this step can lead to poor tool performance and inconsistent results. Proper care extends the life of your honing guide, ensuring it remains reliable for future use.
”
Now, let’s count:
Cleaning
the
honing
guide
is
essential
after
each
use
to
remove
metal
particles
and
residue.
Use
a
soft
brush
or
cloth
to
wipe
down
the
guide,
ensuring
no
debris
remains.
For
tougher
residue,
a
mild
solvent
may
be
used,
but
avoid
harsh
chemicals
that
could
damage
the
material.
After
cleaning,
dry
the

guide
thoroughly
to
prevent
rust.
Regular
maintenance
prevents
clogged
mechanisms
and
ensures
accurate
sharpening.
Neglecting
this
step
can
lead
to
poor
tool
performance
and
inconsistent
results.
Proper
care
extends
the
life
of
your
honing
guide,
ensuring
it
remains
reliable
for
future
use.
That’s .
Storing Chisels Properly
Proper
Repairing Damaged Edges
Repairing damaged chisel edges is crucial for maintaining tool effectiveness. Start by assessing the damage and determining the extent of repair needed. Use a coarse-grit sharpening stone to grind out nicks or chips, working progressively toward finer grits to restore the edge. A honing guide can help maintain the correct angle during this process. For deeply damaged edges, multiple sharpening sessions may be required. Once the edge is smooth and even, finish with a leather strop and honing compound to achieve razor sharpness. Regular maintenance and proper storage can prevent future damage, ensuring your chisels remain in optimal condition for precise woodworking tasks. Always inspect edges before use to avoid further deterioration.
Troubleshooting Common Issues
Identify and address common sharpening issues like uneven edges or guide slippage. Adjust techniques and inspect tools regularly to ensure consistent, razor-sharp results every time.
Uneven Edges
Uneven edges occur when the chisel isn’t sharpened consistently across the bevel. This can happen due to improper angle adjustment or uneven pressure while using the honing guide. To fix this, ensure the guide is securely clamped and aligned properly. Start with a coarse-grit stone to correct the edge, then progress to finer grits for polishing. Apply consistent, light pressure and maintain the same angle throughout the sharpening process. Regular inspection during sharpening can help identify and address unevenness early. Proper technique and patience are key to achieving a smooth, even edge for optimal chisel performance.
Over-Sharpening
Over-sharpening occurs when excessive material is removed, weakening the chisel edge; This often happens when sharpening for too long or with too much pressure. To avoid this, set a timer or limit the number of strokes per session. Use a honing guide to maintain consistent angles and monitor progress. Stop as soon as the edge becomes sharp, as further sharpening can cause unnecessary wear. Regular inspection under good lighting helps detect when the edge is adequately sharp. Remember, the goal is a functional edge, not perfection. Over-sharpening can lead to a brittle or uneven edge, reducing the chisel’s effectiveness and longevity.
Honing Guide Slippage
Honing guide slippage occurs when the guide moves during sharpening, leading to uneven edges. To prevent this, ensure the chisel is securely clamped and the guide is properly aligned. Use a non-slip surface or apply light pressure to stabilize the guide. Check the guide’s roller or clamp for wear and replace if necessary. Regular cleaning of the guide and chisel also helps maintain firm contact. If slippage persists, consider adjusting the guide’s tension or using a different model. Consistent pressure and careful setup are key to avoiding this common issue and achieving precise, even sharpening results every time.
Safety Considerations
Ensure safety by wearing protective gear, maintaining a well-lit workspace, and keeping loose clothing secure. Avoid touching sharp edges and use a stable setup to prevent accidents.
Eye Protection
Protecting your eyes is crucial when sharpening chisels. Wear safety glasses or goggles to shield against flying metal shavings and particles. Even a small fragment can cause serious damage. Choose eyewear with a snug fit and anti-fog coating for clear visibility. Prescription glasses may not offer adequate protection, so consider safety goggles specifically designed for workshop use. Never skip this step, as eye injuries can be irreversible. Keep your work area well-lit to maintain focus and reduce strain. Remember, sharp tools require sharp vision to ensure precision and safety throughout the honing process. Prioritize eye protection to avoid unnecessary risks.
Proper Grip and Control
Maintaining a firm, controlled grip is essential for effective sharpening. Hold the chisel with confidence but avoid over-tightening, as this can restrict movement. Use a controlled motion to guide the chisel along the stone, keeping the bevel flat and evenly pressured. Proper control ensures consistent sharpening and prevents uneven edges. Light, steady strokes are key to achieving a razor-sharp edge. Avoid applying too much pressure, which can damage the chisel or the stone. Practice maintains balance and precision, ensuring your chisels are sharpened safely and effectively for optimal performance in woodworking projects.

Working in a Well-Lit Area
A well-lit workspace is crucial for sharpening chisels. Proper lighting ensures visibility of the edge, allowing precise alignment and control. Natural light or bright artificial lighting helps identify metal scratches and burrs. Shadows can obscure the edge, leading to uneven sharpening. Position the sharpening stone or guide in the light to monitor progress effectively. Good illumination enhances safety, reducing the risk of accidents. A well-lit area also helps maintain consistency in strokes and angles, resulting in a sharper, more precise edge. Always prioritize lighting to achieve professional-grade sharpening and ensure optimal tool performance in woodworking tasks.